Guide How to Restore Your Headlights to Like-New Condition
In this guide, we’ll walk you through the steps to how to restore your headlights to their original clarity. Over time, car headlights can become cloudy, yellowed, or foggy due to exposure to UV rays, road debris, and harsh weather conditions. This not only affects the appearance of your vehicle but also reduces the effectiveness of your headlights, making it difficult to see and be seen on the road. Restoring your headlights can significantly improve your vehicle’s safety and appearance.
1. Why Headlights Become Cloudy
Before diving into the restoration process, it’s helpful to understand why headlights become cloudy in the first place. Most modern headlights are made of polycarbonate plastic, which is durable but prone to oxidation. Over time, UV rays from the sun break down the outer layer of the plastic, leading to a cloudy, yellowed appearance. Additionally, exposure to road debris, dirt, and chemicals can contribute to the degradation of the headlight lens.
2. Tools and Materials You’ll Need
To restore your headlights, you’ll need the following tools and materials:
- Headlight restoration kit (available at most auto parts stores)
- Masking tape
- Sandpaper (various grits: 600, 1000, 2000)
- Microfiber cloths
- Polishing compound
- UV sealant or protective coating
- Spray bottle with water
3. Preparing Your Vehicle
Before you start the restoration process, take a few minutes to prepare your vehicle:
- Clean the headlights: Wash the headlights with soap and water to remove any dirt and debris. Dry them thoroughly with a microfiber cloth.
- Protect surrounding areas: Use masking tape to cover the areas around the headlights. This will prevent accidental scratches to the paintwork during the sanding process.
4. Sanding the Headlights
Sanding is the most critical step in the headlight restoration process. It removes the oxidized layer of plastic and prepares the surface for polishing.
- Start with coarse grit sandpaper (600 grit): Wet the sandpaper with water and begin sanding the headlight using straight, horizontal strokes. Keep the surface wet while sanding to prevent scratching. Continue sanding until the surface feels smooth and the yellowing or cloudiness begins to disappear.
- Move to a finer grit (1000 grit): Repeat the sanding process with 1000 grit sandpaper. This step will further smooth out the headlight surface and remove any remaining oxidation.
- Finish with the finest grit (2000 grit): Finally, use 2000 grit sandpaper to create an even smoother surface, preparing the headlights for polishing. At this stage, the headlights may appear slightly hazy, which is normal.
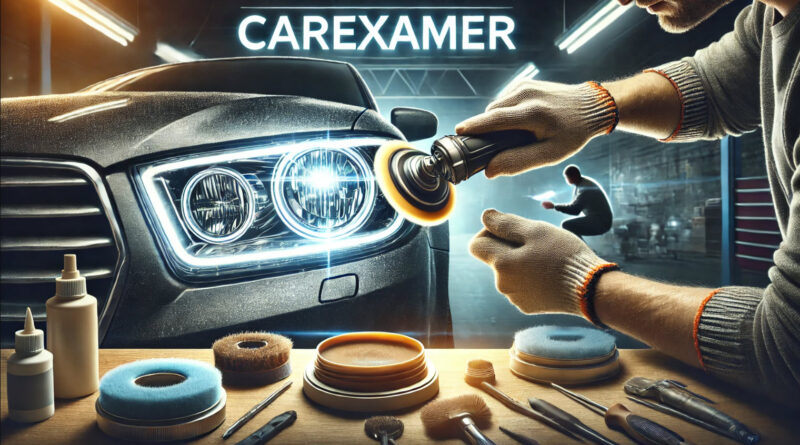
5. Polishing the Headlights
Polishing is essential to restoring the clarity of your headlights after sanding.
- Apply polishing compound: Apply a small amount of polishing compound to a clean microfiber cloth or a polishing pad. Rub the compound onto the headlight using circular motions.
- Buff the headlights: Continue polishing the headlight until the haze begins to clear and the lens looks more transparent. This step may require some time and effort, so be patient.
- Wipe clean: Once you’re satisfied with the clarity, wipe off any remaining polishing compound with a clean microfiber cloth.
6. Applying a UV Sealant
After restoring the clarity of your headlights, it’s crucial to protect them from future damage.
- Apply UV sealant: Use a UV sealant or protective coating specifically designed for headlights. Apply it according to the manufacturer’s instructions. This coating will protect the headlights from UV rays and keep them clear for longer.
- Let it dry: Allow the sealant to dry completely before using your vehicle. This usually takes about 24 hours.
7. Maintenance Tips
To keep your headlights looking like new, follow these maintenance tips:
- Regular cleaning: Clean your headlights regularly with soap and water to prevent dirt buildup.
- Park in the shade: Whenever possible, park your car in a shaded area or garage to minimize UV exposure.
- Reapply UV protection: Reapply a UV protective coating every few months to maintain the clarity of your headlights.
8. Professional vs. DIY Headlight Restoration
While DIY headlight restoration can be effective, some cases may require professional intervention. If your headlights are severely damaged or if you’re not confident in your ability to restore them yourself, it may be worth considering a professional headlight restoration service. Professionals have access to specialized tools and products that can achieve better results, especially for heavily oxidized headlights.
Conclusion
Restoring your headlights is a cost-effective way to improve both the appearance and safety of your vehicle. By following this guide, you can effectively remove cloudiness and yellowing from your headlights, restoring them to their original clarity. Regular maintenance and protection will help keep them looking clear and bright, ensuring you have the best possible visibility on the road. Whether you choose to tackle the job yourself or opt for professional help, headlight restoration is an investment in your car’s safety and aesthetics.
Buying a used VW. Buying used vauxhall, BMW, Jaguar, Ford, Volvo, Range rover, Bentley, Aston Martin, Porsche, Ferrari, Lamborghini, Maserati, Hyundai, Tesla, Honda, Pagani