Guide How to Use a Car Paint Thickness Gauge
Estimated reading time: 5 minutes
This guide will walk you through the steps of hot to use a car paint thickness gauge, explain the types of gauges available, and highlight the importance of accurate paint thickness measurements. Accurately measuring the thickness of automotive paint is essential for quality control, repair verification, and ensuring the longevity of a vehicle’s finish. Using a car paint thickness gauge is a straightforward process, but understanding the correct techniques and best practices is crucial for obtaining precise results.
On pre purchase inspections it relates to paint thickness measurement to identify poorly repaired vehicles and if used car buyer is satisfied with overall poor bodywork and good mechanical and electrical condition of the vehicle so the buyer can renegotiate the price or walk away.
Types of Paint Thickness Gauges
- Magnetic Induction Gauges: Ideal for measuring non-magnetic coatings on ferrous substrates, such as steel.
- Eddy Current Gauges: Used for measuring non-conductive coatings on non-ferrous substrates, like aluminium.
- Ultrasonic Gauges: Suitable for a wide range of substrates, including plastic and composites, and can measure multiple layers of paint.
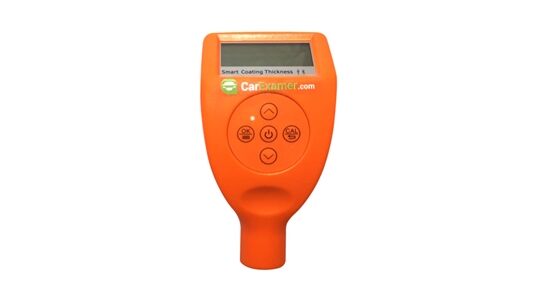
- Digital Coating Thickness Gauges: These portable devices are popular for their ease of use and accurate digital readouts. (magnetic, eddy they are mostly now combined in one digital gauge and automatically recognises the material)
Steps to Use a Car Paint Thickness Gauge
Like every piece of equipment, you can buy, paint thickness gauges come in different levels of advancement too. There are options to buy more basic equipment for lower prices all the way through to the high end, top of the range gauges. The differences aren’t small either. More high-end advanced meters, for example, have a lot of features that more basic thickness gauges aren’t able to offer you. That makes them a great tool to have since they’re actually able to make the whole thing a lot easier. They are equipped with features like more accurate readings on the gauge, a much greater number of measurements available, a more reliable average overall as a result after removing outliers and odd data. It’s a huge deal. You can even save the results along with the registration of the vehicle in order to access all of this data later one, which is perfect if you’re doing this professionally or handle multiple vehicles.
To put that into context, the lower end thickness gauges don’t really come close to having that kind of capability. They tend to cap at a total of 90 readings in some cases, which can really offset your results if you’re doing a larger or more in-depth reading.
- Select the Appropriate Gauge:
- Ensure you choose a gauge suitable for the substrate material of your vehicle. Magnetic induction gauges for steel, eddy current gauges for aluminium, and ultrasonic gauges for plastic or composite panels.
- Calibrate the Gauge:
- Calibration is crucial for accurate measurements. Use the standard calibration blocks provided with the gauge.
- Follow the manufacturer’s instructions to calibrate the gauge. Typically, this involves placing the gauge on a known thickness and adjusting it to read correctly.
- Prepare the Surface:
- Clean the area to be measured. Remove any dirt, dust, or contaminants that could interfere with the readings.
- Ensure the surface is dry and free from any obstructions.
- Take Multiple Measurements:
- Place the gauge’s probe flat against the paint surface and take a reading.
- Measure at multiple points across the panel to account for variations. Aim for at least five measurements per panel.
- Record the readings for analysis.
- Interpret the Results:
- Compare the readings to industry standards. OEM paint typically ranges on most common car paintworks from 100 to 150 micrometres (µm) or microns
- Consistent readings indicate a uniform paint job, while significant variations may suggest repairs or uneven application.
- Excessive thickness might indicate multiple layers of paint, possibly due to resprays, while thin coatings may suggest inadequate protection.
Importance of Measuring Paint Thickness and Clear Coats
When detailing a car, measuring paint thickness is critical for several reasons:
- Quality Control: Ensures the paint job meets required standards and maintains the vehicle’s aesthetic appeal.
- Repair Verification: Detects previous repairs, resprays, or the application of body filler, which is vital for vehicle inspections and valuations.
- Corrosion Prevention: Adequate paint thickness protects the underlying metal from rust and corrosion.
- Warranty Compliance: Adhering to manufacturer’s paint thickness standards is crucial for warranty claims and ensuring long-term durability. However OEM on most cars there is no real standard and in automotive repair industry body repair shops doesn’t use the gauge nor check for quality control to double check they work quality just to add reality.
Advanced Detailing Techniques
- Finessing: This polishing process removes surface damage such as fine scratches, scuffs, swirl marks, oxidation, stains, paint overspray, tar, tree sap, acid rain, or water spots. It often involves using an orbital or high-speed polisher.
- Sanding and Buffing: For extensive paint problems, several sanding and buffing steps may be required to bring the paint back closer to its original beauty.
- Clear Coat Systems: Most modern vehicles use a clear coat system where a thin layer of color is applied, followed by multiple layers of clear non-pigmented paint.
- Single-Stage Paint Systems: Less common today, these involve the application of multiple layers of pigmented paint.
Tips for Accurate Measurements
- Consistent Pressure: Apply consistent pressure when taking readings to avoid skewed results.
- Avoid Edges and Curves: Measure on flat areas away from edges and curves, as these can give inaccurate readings.
- Temperature Considerations: Measure in a consistent temperature environment to avoid the influence of thermal expansion or contraction.
Using a car paint thickness gauge is a simple yet essential process for anyone involved in automotive maintenance, repair, or quality control. By following the correct steps and understanding the importance of accurate measurements, you can ensure that your vehicle’s paint job is up to standard and its aesthetic and protective qualities are maintained. Whether you’re a professional or a car enthusiast, mastering the use of a paint thickness gauge will enhance your ability to assess and maintain automotive finishes effectively.